

How to Clean and Sanitize Dog Grooming Clippers
Table of Contents
- Daily Cleaning Routine for Dog Grooming Clippers
- How to Oil Dog Grooming Clippers
- Deep Cleaning and Sanitizing Dog Clippers
- Choosing the Best Clipper Blade Coolant Spray
- Your Clipper Blade Maintenance Schedule
- Signs of Dull or Damaged Blades
- Storing Grooming Equipment and Long-Term Care
- Frequently Asked Questions
Last Updated: September 23, 2026
Daily Cleaning Routine for Dog Grooming Clippers
Learning how to clean and sanitize dog grooming clippers starts with one habit: brush the blades after every single use. According to PetEdge grooming equipment guidance, industry guidance favors dedicated blade disinfectants over household cleaners, which can pit or mar metal surfaces. A two-minute daily routine can prevent much of the damage that sends clippers to the repair bench.
Here's the daily drill:
- Unplug the clipper before you touch the blade.
- Brush hair out of the teeth with a small stiff brush.
- Wipe the blade with a damp cloth.
- Apply one or two drops of clipper oil.
- Store the clipper flat, blade down, until tomorrow.
That's it. No water baths, no soaking. The whole routine takes about two minutes.
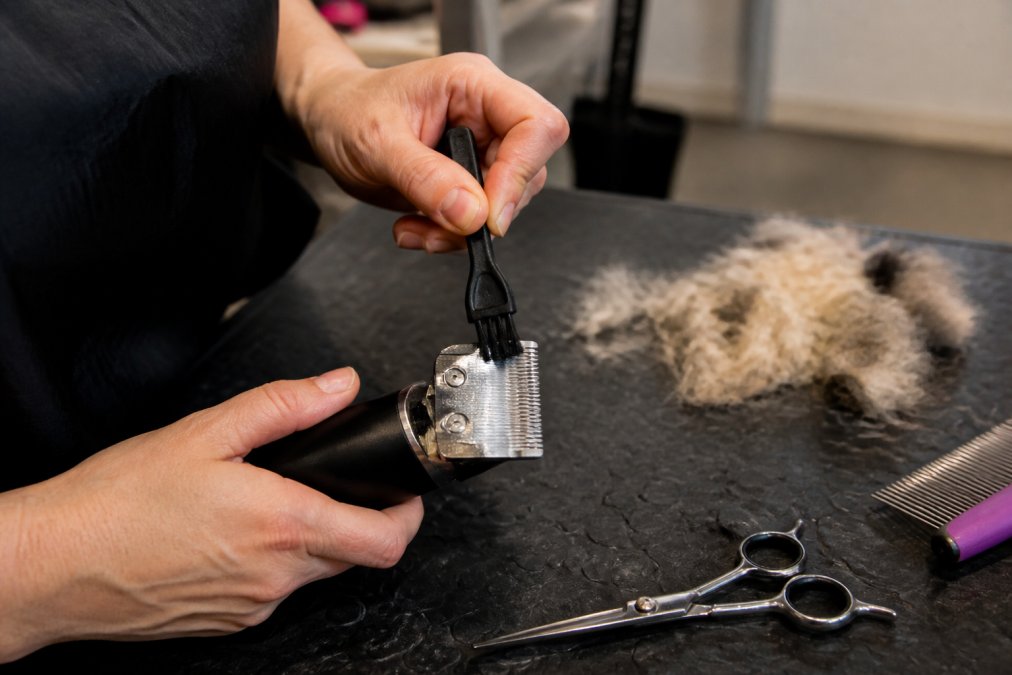
Removing Hair and Debris from Blades
Trapped hair is the number one cause of overheating and poor cutting. Brush in the direction the hair entered, from the base of the teeth outward.
For stubborn debris, use a toothbrush or the small brush that came with your clipper. Never use a pin or needle to dig hair out; you can bend the teeth and throw off teeth alignment.
Using Blade Wash and Cleaning Solutions
Blade wash is a liquid cleaner made for clipper blades. It loosens hair, grease, and product buildup that brushing alone leaves behind.
- Use a shallow dish, not a deep soak
- Dip only the blade, never the housing
- Run the clipper briefly so the wash works through the teeth
- Dry the blade fully before oiling
A common mistake is dunking the whole head in water. Water reaches the motor and rust starts inside where you can't see it.
How to Oil Dog Grooming Clippers
The short answer: one or two drops of clipper oil on the blade before every use, plus a drop during long sessions. Oiling is the single cheapest way to extend blade life.
"Clipper blades really need to stay super lubed.
Deep Cleaning and Sanitizing Dog Clippers
Deep cleaning means removing the blade, washing it, disinfecting it, and letting it dry completely. Do this weekly for home groomers and between every dog in a salon setting.
- The blade touched a dog with a known skin issue
- The blade nicked skin and drew blood
- You are moving between dogs in a multi-pet household or salon
- The blade sat unused for more than a few days
Cleaning Detachable Blades by Material Type
Detachable blades come in steel, ceramic, and coated variants, and they do not like the same treatment. This is where most generic guides fall short.
| Blade Material | Cleaning Method | Disinfection Step | Watch Out For |
|---|---|---|---|
| Carbon steel | Blade wash dip, stiff brush, oil immediately | Quaternary ammonium wipe, air dry | Rusts within hours if left damp |
| Stainless steel | Blade wash dip, brush, oil | Quaternary ammonium or accelerated hydrogen peroxide wipe | Chlorine bleach pits the surface over time |
| Ceramic | Wipe with blade wash on a soft cloth, air dry | Alcohol wipe, air dry | Cracks from drops, thermal shock, or rapid cooling |
| Titanium or chrome coated | Soft cloth and mild blade wash | Alcohol wipe | Abrasive brushes and bleach strip the coating |
How to Tell If a Blade Is Sanitized, Not Just Clean
Clean and sanitized look identical to the eye, which is why groomers skip the second step. Use these visual and tactile checks before you call a blade done:
- No visible film. A clean blade looks dry and matte. A greasy sheen means residue is still there and disinfectant will not bond.
- No hair in the socket. Shine a light into the blade socket and the hinge. Hair packed behind the cutter is the most common hidden reservoir.
- Teeth pass the fingernail test. Run a fingernail along the teeth. Any grit or tackiness means re-wash.
- No odor. A sour or metallic smell after drying signals bacteria still present.
- Dry to the touch, including the hinge. Moisture in the hinge is where rust starts.
Safety Precautions and Environmental Disposal
Unplug the clipper before any deep clean. A blade that starts mid-wipe can cut deep.
Choosing the Best Clipper Blade Coolant Spray
The best clipper blade coolant spray is one made for grooming clippers, not a general-purpose lubricant. Coolant sprays drop blade temperature fast during long grooms, which protects both the blade and the dog's skin.
Look for:
- A spray rated for clipper blades
- Fast evaporation with no oily residue
- A scent-free or mild formula for sensitive dogs
Your Clipper Blade Maintenance Schedule
A written clipper blade maintenance schedule beats memory every time. Post it near your grooming table.
| Task | Frequency | Time Needed |
|---|---|---|
| Brush out hair | After every use | 1 minute |
| Oil the blade | Before every use | 30 seconds |
| Blade wash dip | Weekly | 5 minutes |
| Full sanitize and dry | Weekly (daily in salons) | 15 minutes |
| Inspect teeth and screws | Monthly | 5 minutes |
| Professional sharpening | Every 4-6 weeks of heavy use | Send out |
Signs of Dull or Damaged Blades
A dull blade pulls hair instead of cutting it. Your dog will tell you before you notice.
Watch for:
- Snagging or tugging mid-cut
- Visible lines or uneven patches in the coat
- The blade getting hot within a minute
- A change in motor sound, like a strained whine
- Chipped or bent teeth
Storing Grooming Equipment and Long-Term Care
Store clippers flat with the blade oiled and the cord loosely coiled. Moisture is the enemy, so keep them out of damp cabinets and bathrooms.
Long-Term Storage Protocol for Seasonal Groomers
Follow this sequence before any storage longer than four weeks:
- Clean and sanitize every blade first, then dry completely.
- Run the clipper for 30 seconds with no blade attached to warm the motor and drive out residual moisture.
- Apply three to four drops of clipper oil at the blade drive and let the clipper run another 15 seconds so oil distributes through the internal mechanism.
- Wipe off external excess oil; leave the internal film in place.
- Store blades in a dry case, not a plastic bag. Plastic traps humidity against the metal.
- Keep a silica packet in the case and replace it every few months.
- Store the clipper body in its original box or a hard case with the cord loosely coiled, never wrapped tight around the body.
- Re-oil and run the clipper for 30 seconds before the first use back.
Storage by Blade Material
Storage rules differ by blade material, and most guides ignore this:
- Carbon steel blades need a heavier oil film and a silica packet. They rust fastest.
- Stainless steel blades tolerate a lighter oil film but still need dry storage.
- Ceramic blades should be stored in a padded slot or original case. They do not rust, but they chip if they knock against steel blades in a shared drawer.
- Coated blades should not be stored touching other blades. Coating wear is the failure mode, and metal-on-metal contact accelerates it.
Environmental Controls That Actually Matter
If handling a wriggly dog during cleanup worries you, our Protective Pet Handling Gloves add a barrier against ordinary scratches for $15.25. They aren't bite-proof, so supervise every session.
Frequently Asked Questions
Does rubbing alcohol sanitize dog grooming clippers?
Rubbing alcohol can sanitize metal clipper blades, but it is not ideal for routine use. It can dry out the metal and strip away the protective oils that prevent rust and friction. For effective sanitization, use a dedicated blade disinfectant like Barbicide or a product specifically designed for grooming equipment. Always oil your blades immediately after using alcohol to restore lubrication.
How often should I oil my clipper blades during a grooming session?
You should oil your clipper blades every few minutes during a grooming session, especially when the blades start to feel warm. Professional groomers recommend applying one or two drops of clipper oil directly onto the blade teeth while the clipper is running. This reduces friction and prevents overheating. If you are using a coolant spray, apply it between oiling to keep the blades cool.
Can I use household cleaners like Lysol on clipper blades?
No, you should not use household cleaners like Lysol on clipper blades. These products contain harsh chemicals that can pit or mar metal surfaces, leading to corrosion and dull blades. Industry guidance warns against household cleaners and favors products specifically made for grooming equipment, such as Oster Disinfecting Spray or Barbicide. Always follow the manufacturer's instructions for safe disinfection.
What are the signs that my clipper blades need a deep clean?
Signs your clipper blades need a deep clean include visible hair and debris packed between the teeth, a noticeable decrease in cutting speed, and the blades feeling unusually hot during use. You might also see a buildup of sticky residue from grooming products. If oiling and brushing do not restore performance, remove the blade and follow a deep-cleaning protocol with a blade wash or disinfectant.
Cleaning and sanitizing clippers takes minutes, but skipping it costs blades, motors, and comfortable grooms. At Pets R Smarter, we stock expert-approved grooming tools backed by our Tail Satisfaction Guarantee, so you can care for your dog with confidence. Browse our premium grooming selection and make every session easier on both of you.