

How to Trim Dog Nails Without Pain: A Gentle Guide
Table of Contents
- Why Pain-Free Nail Trimming Starts Before the Clippers Come Out
- How to Find the Quick on Dog Nails: Reading Nail Color and Texture
- Dog Nail Clippers vs. Grinder: Choosing the Right Tool for Your Dog
- Step-by-Step: How to Trim Dog Nails Without Pain
- Dog Nail Trimming for Anxious Dogs: A Gradual Plan That Works
- What to Do If You Cut a Dog's Quick: A Calm Bleeding-Response Protocol
- Maintaining Nail Length After an Overgrowth Trim
- Conclusion
- Frequently Asked Questions
Last Updated: October 6, 2026
Why Pain-Free Nail Trimming Starts Before the Clippers Come Out
Learning how to trim dog nails without pain comes down to one idea: most of the work happens before the blade touches a nail.
A study in Applied Animal Behaviour Science (2022) examined how 35 companion dogs responded to a standard nail trim, tracking body signals and stress markers. The takeaway: comfort is not guaranteed, so it has to be built.
Preparing Your Dog and Choosing a Calm Setting
Pick a quiet room, a non-slip surface, and a time when your dog is already tired. A post-walk window works well. Keep treats within reach and skip the audience.
Set the scene before you bring the dog in:
- Good lighting, so you can see the nail clearly
- A towel or mat to stop slipping
- High-value treats, not the everyday kibble
A calm setting does most of the heavy lifting. If the doorbell rings or kids run through, stop and try again later.
Paw Handling and Desensitization: Building Trust Step by Step
Paw desensitization means touching and holding a dog's feet during normal, non-grooming moments so the paw stops being a trigger. Start with a few seconds of gentle handling, reward, and release. Repeat daily.
Work up in stages:
- Touch one paw for two seconds, then treat
- Hold the paw for five seconds, then treat
- Press lightly on a toe to extend the nail, then treat
- Tap the nail with the clipper (no cut), then treat
Positive reinforcement does the rest. Keep sessions short, and always end on a win.
How to Find the Quick on Dog Nails: Reading Nail Color and Texture
The quick is the living, blood-filled core inside each nail, and finding it is the single most important skill in pain-free trimming. Here is the step-by-step method for both light and dark nails, plus what to do when you cannot see it.
Light Nails: Read the Pink Center
On white, tan, or translucent nails, the quick shows through as a pink or reddish core running down the center. As you trim thin slices from the tip, watch the cut surface:
- The first slices reveal a solid, opaque white or cream center.
- As you get closer, a pink or gray dot appears in the middle of the cut surface.
- That dot is your stop signal. Put the clipper down.
On light nails, the safe stopping point is usually a couple of millimeters past where the pink fades. Take one slice at a time and check after every pass.
Dark Nails: Switch From Color to Texture
Black and dark brown nails hide the quick completely, so color cues are useless. You have to read texture and shape instead:
- Trim thin slivers only. Never take a full-length cut on a dark nail.
- Watch the cut surface after each pass. A solid, dry, chalky white or gray ring means you are still in the dead portion.
- Stop the moment you see a gray, pink, or dark dot in the center of the cut surface. That dot is the top of the quick.
Groomers often stop one slice earlier than feels necessary on dark nails. You can always take more next week; you cannot put it back.
When You Cannot See the Quick at All
Some nails are too thick, too dark, or too overgrown to read reliably. In that case:
- Trim only the very tip, then wait one to two weeks and trim again. The quick recedes slightly each time, gradually exposing more dead nail.
- Use a grinder on a low setting instead of clippers. Grinders remove material in finer increments and let you stop instantly when you see a color change.
- Ask a veterinarian or groomer to show you the stopping point on your dog's nails once. After that, you can replicate it at home.
Veterinary sources consistently list overgrown or ingrown nails as one of the most common reasons owners bring dogs in for nail care, reading the nail correctly is what prevents that visit.
Dog Nail Clippers vs. Grinder: Choosing the Right Tool for Your Dog
The best tool is the one your dog tolerates and you can control. Clippers remove length fast; a grinder smooths and shapes and suits dogs who panic at the snip sound.
| Tool | Best For | Watch Out For |
|---|---|---|
| Scissors-style trimmer | Thick nails, quick cuts | Easy to cut too much at once |
| Guillotine clipper | Small to medium nails | Dulls fast on thick nails |
| Nail grinder | Nervous dogs, smooth finish | Noise-sensitive dogs |
| Nail clipper with guard | Beginners | Less control on odd angles |
For most owners, a simple stainless steel clipper is the right starting point. Our Dog & Cat Nail Clipper is a scissors-style trimmer built for routine at-home grooming and suits a first-timer learning the angle.
Step-by-Step: How to Trim Dog Nails Without Pain
Here is the full sequence. Work on one paw at a time, and stop if your dog pulls away twice in a row.
Total time: 10-15 minutes for a cooperative dog Difficulty: Beginner, with practice
Positioning the Paw and Making the Cut
Hold the paw firmly but gently, thumb on top of the toe and fingers underneath, to keep the nail steady and stop it rolling.
The cutting angle matters. Trim straight across the tip, perpendicular to the nail, not at a slant. Slicing at an angle raises the odds of hitting the quick.
Trimming in Small Increments
Take off a tiny sliver, then look. Take off another, then look again. This is the whole secret to avoiding pain.
Work in millimeter increments on each nail:
- Trim one thin slice from the tip
- Check the cut surface for the chalky ring or a dot
- Trim one more slice only if the nail is still long
- Stop well before the quick
- Reward, then move to the next nail
Do the front paws first. They are usually easier, and a win there sets up the back paws.
Dog Nail Trimming for Anxious Dogs: A Gradual Plan That Works
Fearful dogs need a slower runway, and forcing it backfires. Spread the work across a week or two, treating each stage as its own goal.
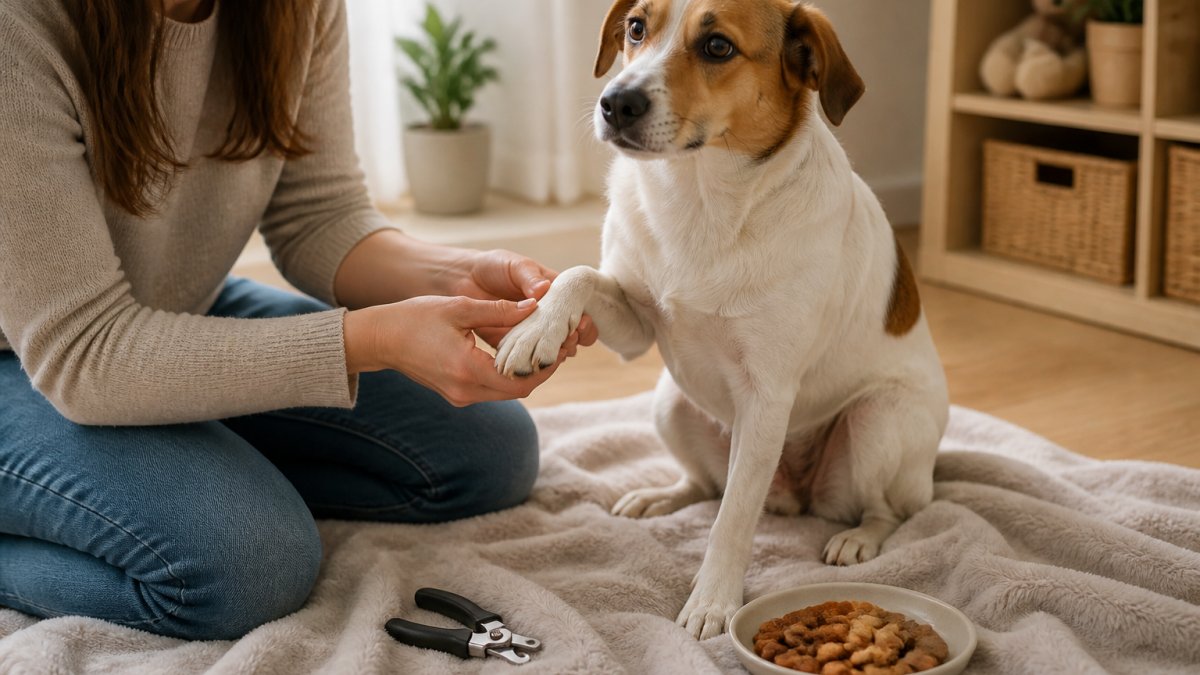
A gradual plan for a fearful dog:
- Day 1-2: touch paws only, no tools, lots of treats
- Day 3-4: hold the clipper near the paw, no contact
- Day 5-6: tap the nail with the clipper, no cut
If your dog freezes, pants, or tries to bolt, that is your cue to back up a step. A professional groomer or veterinarian can also handle the first trim and show you the technique in person.
What to Do If You Cut a Dog's Quick: A Calm Bleeding-Response Protocol
It happens to almost everyone, even experienced owners. The difference between a minor mishap and a traumatic one is preparation. Keep a small first-aid kit within arm's reach of your trimming spot so you never leave a bleeding dog to search for supplies.
Supplies to Keep on Hand
- Styptic powder (the most common brand is Kwik Stop) or a styptic pencil
- Clean gauze pads or a washcloth
- Cornstarch or flour as a backup if you run out of styptic powder
Styptic powder contracts the blood vessels at the tip of the nail. Cornstarch or flour slows a minor bleed but is less effective on a quick that is actively pulsing.
The Bleeding-Response Protocol
- Stay calm and keep your voice steady. Your dog reads your energy fast, and a panicked owner turns a small bleed into a scary event.
- Apply firm, steady pressure with gauze or a clean cloth. Do not dab. Hold.
- Press styptic powder onto the tip if you have it. If the powder is in a container, dip the nail into it rather than pouring it on.
- Hold pressure for a full two to three minutes without checking. Lifting the gauze to peek restarts the clot.
- Reward your dog and end the session. Do not attempt another nail that day.
- Resume trimming in a few days, not right away. Give the nail time to seal and the dog time to forget.
When Bleeding Warrants Veterinary Care
Most quick bleeds stop with steady pressure within a few minutes. Call your veterinarian if:
- Bleeding continues past 10 minutes despite pressure and styptic powder
- The nail looks cracked, split, or partially detached
- The nail bed is swollen, warm, or has a discharge
A nail that is cracked or torn below the quick may need to be trimmed back by a veterinarian under local anesthetic. Trying to finish the job at home risks making the injury worse.
Quick bleeding is common enough that most veterinary clinics field calls about it regularly. It is not a sign you did something wrong or a reason to give up on at-home trimming, just a reason to keep styptic powder in the drawer and take smaller slices next time.
Maintaining Nail Length After an Overgrowth Trim
Overgrown nails do not fix in one session. The quick has grown long too and needs time to recede.
Trim a little every one to two weeks. As the quick recedes, you can take slightly more each time. Here is how to keep up with it:
- Aim for every 2-3 weeks once nails are at a healthy length
- Listen for clicking on hard floors, a sign they are due again
- Check the back paws, which wear down slower than the front
A height-adjustable grooming table makes longer sessions easier on your back. Our Height-Adjustable Pet Grooming Table rotates 360 degrees and has a storage compartment for clippers and treats.
Conclusion
Nail trims go wrong when owners rush a dog that has not been set up to succeed. Build the trust first, read the nail carefully, and take off less than you think you need.
At Pets R Smarter, our grooming tools are chosen with exactly this in mind: pet comfort, safety, and a process that is easier on both of you.
Frequently Asked Questions
How do you trim a dog's nails without hurting them?
To trim dog nails without pain, cut tiny slivers at a time, stopping before the pink or dark quick. Use sharp clippers or a grinder, hold the paw firmly but gently, and reward calm behavior with treats. For dark nails, stop when you see a grayish or pink dot in the cut surface. If your dog flinches or pulls away, pause and try again later. Keeping sessions short and positive prevents pain and stress.
How can you tell where the quick is on a dog's nail?
On light nails, the quick appears as a pink or red area inside the nail. On dark nails, look for a small gray or pink dot on the cut surface after each small trim. Another clue is the texture: the dead portion looks dry and powdery, while the live quick is softer. When in doubt, trim less and check often. Learning how to find the quick on dog nails is the key to avoiding pain.
What should you do if you accidentally cut the quick?
If you cut a dog's quick, stay calm and apply styptic powder or cornstarch to the nail tip with light pressure. Keep your dog still for a few minutes until bleeding stops. If bleeding persists beyond 10 minutes or is heavy, contact your veterinarian. Most quick cuts are minor, but they can be painful, so give your dog a break and plenty of praise. Avoid trimming that nail again for a few days.
Are dog nail grinders safer than clippers?
Grinders and clippers each have pros and cons. Grinders smooth nails and reduce the risk of splitting, but they can cause friction heat if used too long on one nail. Clippers are faster but can crush the nail if dull. For anxious dogs, a quiet grinder may be less startling than the snap of clippers. The best choice depends on your dog's nail thickness and temperament. Always introduce the tool gradually.