

Prevent Dog Grooming Injuries: A Step-by-Step Safety Guide
Table of Contents
- Why Grooming Injuries Happen: Understanding the Risks
- Safe Dog Grooming Tools: What You Need to Get Started
- How to Trim Dog Nails Without Injury
- Preventing Clipper Burn on Dogs: Technique and Maintenance
- Handling Techniques to Prevent Stress and Injury
- First Aid for Dog Grooming Cuts and When to Seek Help
- Breed-Specific Injury Risks and Prevention
- Conclusion: Making Grooming Safe for Your Dog
Last Updated: August 28, 2026
Why Grooming Injuries Happen: Understanding the Risks
Dog grooming injuries are far more common than most pet owners realize. According to the International Grooming Society's Global Groomer Health Initiative, 87% of groomers report having been injured by a dog during their career, and 62% have suffered equipment- or environment-related accidents. These aren't freak incidents, they're occupational realities that reveal systemic vulnerabilities in how grooming happens, whether at a professional salon or at home.
At Pets R Smarter, we've analyzed what drives these injuries and what actually prevents them. The pattern is consistent: injuries cluster around three categories. First, there's trauma from the dog itself, bites, scratches, or sudden movement that catches skin or eyes. Second, there's environmental hazard exposure: wet floors causing slips, sharp tools catching skin, or hot equipment causing burns. Third, there's the invisible threat, stress-induced reactions that escalate handling difficulty and increase injury risk for both groomer and dog.
The stakes are significant. When ocular injuries occur during grooming, corneal ulceration accounts for 71% of incidents, and 14% require surgical intervention. Small-breed dogs, particularly Shih Tzus, represent 71% of ocular injury cases, a breed-specific vulnerability that demands targeted prevention. Understanding why these injuries happen is the foundation for preventing them.
Safe Dog Grooming Tools: What You Need to Get Started
The right equipment makes injury prevention possible; the wrong equipment makes it inevitable. Safe grooming tools share specific characteristics: they're designed with temperature control, feature sharp blades that reduce pressure and repetitive motion, include ergonomic handles that prevent hand strain, and are constructed from materials that resist bacterial growth.
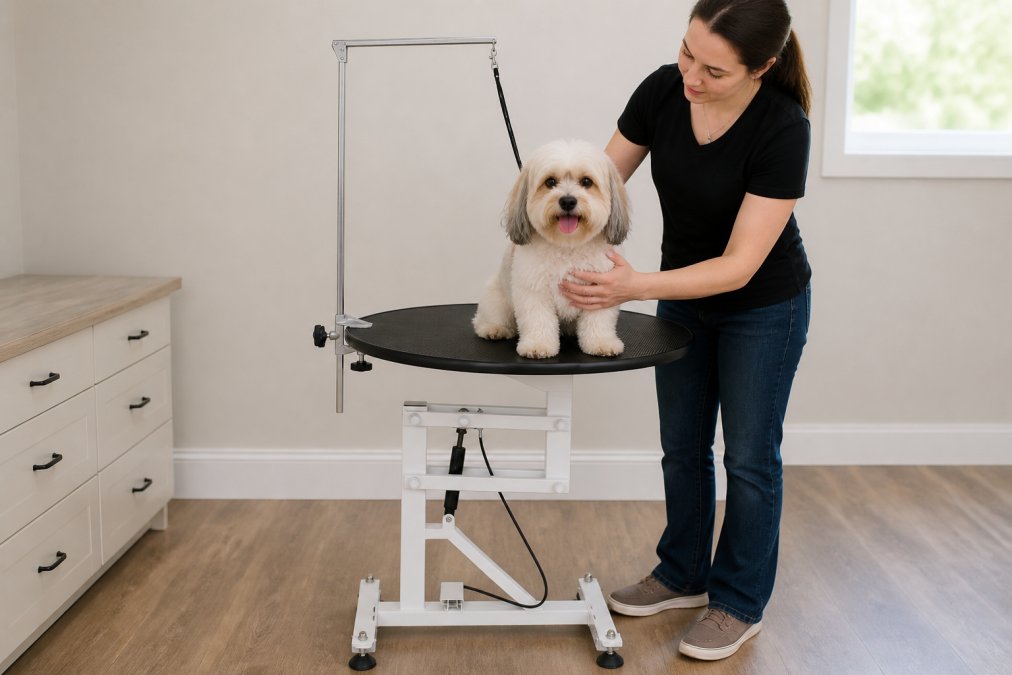
Start with a grooming table that prioritizes stability. The ASPCA's research on grooming barriers found that 45% of pet owners fear hurting their pet during at-home grooming, often because they're working on unstable surfaces. A height-adjustable table eliminates awkward bending, reduces pressure on your joints, and gives your dog a secure, non-slip platform. Pets R Smarter's Height-Adjustable Pet Grooming Table features a 360-degree rotating surface and storage compartment, priced at $170.75, which removes the guesswork from positioning and makes the entire process safer for both handler and dog.
Next, invest in quality nail clippers. Dull clippers crush the nail instead of cutting cleanly, causing pain and increasing the dog's resistance to handling. Stainless steel clippers maintain their edge longer and resist corrosion from moisture. Pets R Smarter's Dog & Cat Nail Clipper ($12.50) is constructed from stainless steel and designed for clean, efficient cuts that minimize the dog's stress response.
A slicker brush and deshedding tool prevent matting, which restricts movement and creates pressure points during grooming. Matted coat also traps moisture against the skin, creating conditions for irritation and infection. The Slicker Grooming Brush for Dogs & Cats ($14.99) and the Dog & Cat Deshedding Grooming Brush ($60.75) work together to maintain coat health before you ever reach the clippers or scissors.
| Tool | Purpose | Why It Matters for Injury Prevention |
|---|---|---|
| Height-adjustable grooming table | Stable, ergonomic work surface | Reduces handler strain, gives dog secure footing |
| Stainless steel nail clipper | Clean, efficient nail trimming | Prevents nail crushing, reduces dog resistance |
| Slicker brush | Removes tangles and mats | Prevents restricted movement during grooming |
| Deshedding brush | Removes loose undercoat | Reduces skin irritation and infection risk |
How to Trim Dog Nails Without Injury
Nail trimming is where most at-home grooming injuries occur, because it requires restraint and precision simultaneously. The nail quick, the blood vessel and nerve inside the nail, sits closer to the surface in some dogs than others, and it's invisible until you cut into it. Trimming without injury means understanding anatomy, using proper technique, and knowing when to stop.
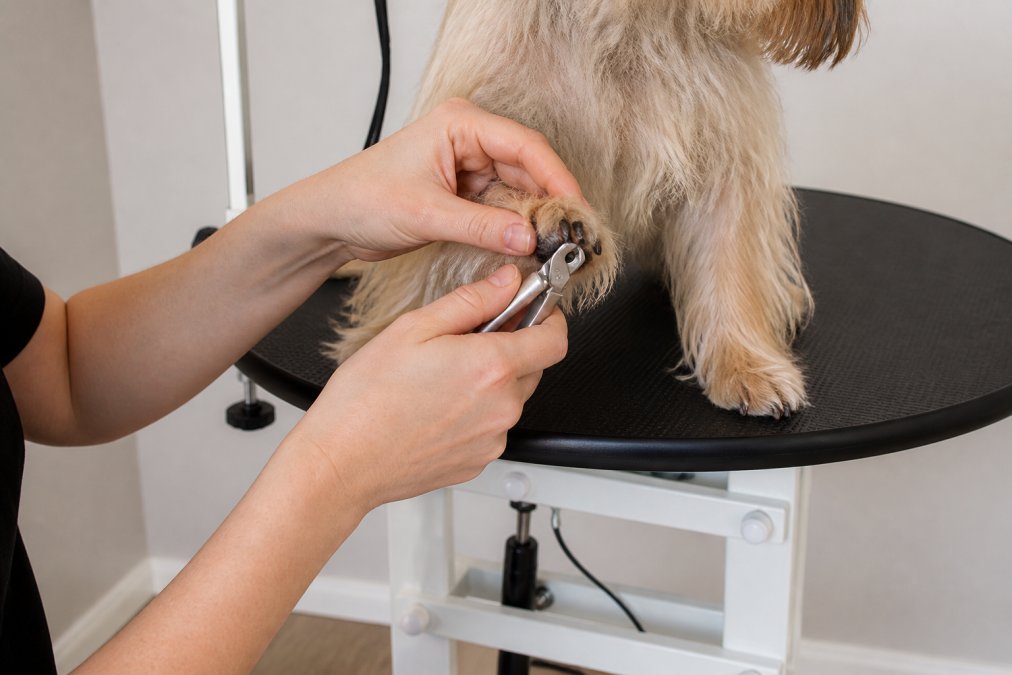
Start by identifying the quick. In light-colored nails, you'll see a dark circle in the center of the nail's cross-section, that's the quick. In dark nails, you can't see it, so trim conservatively: cut only the hook-shaped overgrowth at the tip, leaving most of the nail intact. A safe approach is to trim small amounts, check the nail end for a small gray or pink dot (the quick's proximity), and stop when you see it.
Position the clipper at a 45-degree angle to the nail, perpendicular to the direction the nail grows. This angle cuts cleanly rather than crushing. Squeeze the clipper handles with steady, controlled pressure, don't jab or hesitate mid-cut. A hesitant, slow squeeze causes the dog pain and increases the likelihood of sudden movement that results in a cut paw or your hand being in the wrong place.
If you do cut the quick, have styptic powder on hand immediately. Apply it directly to the bleeding nail, hold pressure for 30 seconds, and keep the dog calm. Styptic powder contains agents that cause blood to clot rapidly. If bleeding doesn't stop after 5 minutes of pressure and powder application, contact your veterinarian, excessive bleeding can indicate a clotting disorder.
Preventing Clipper Burn on Dogs: Technique and Maintenance
Clipper burn, the redness and irritation that appears after clipping, results from blade temperature, improper technique, or inadequate lubrication. Clipper blades generate heat through friction. High-speed clippers (3,400+ strokes per minute) heat faster than low-speed models. Without proper cooling and lubrication, that heat transfers directly to the dog's skin, causing burns that range from mild irritation to visible lesions.
Prevent clipper burn through three mechanisms: blade maintenance, temperature management, and technique. First, use a sterile lubricant designed for grooming clippers. Water-soluble lubricants cool the blade while reducing friction. Apply lubricant to the blade every 15 minutes of continuous clipping, don't wait until you notice heat. Second, change blades if they feel hot to the touch. A hot blade means friction is excessive, and continuing will damage skin. Third, clip in the direction of hair growth, not against it. Clipping against the grain (which creates a closer cut) requires more blade passes over the same skin and generates more heat.
For dogs with sensitive skin or low tolerance for grooming, use a lower-speed clipper or hand-strip instead of clipping. Hand-stripping removes coat by plucking rather than cutting, generating no heat and causing less stress. It takes longer and requires more skill, but it's the safest option for dogs prone to skin irritation.
Handling Techniques to Prevent Stress and Injury
How you restrain and handle a dog during grooming determines whether the dog cooperates or escalates. Stressed dogs bite, pull, and thrash, behaviors that create injury risk for both handler and dog. Research from the Journal of the American Animal Hospital Association found that 33% of dogs with ocular injuries during grooming had aggressive or reactive behaviors reported, suggesting that stress-induced movement directly contributed to the injury.
Start with desensitization training weeks before grooming. Let your dog stand on the grooming table fully clothed, with no tools present. Reward calm behavior with treats and praise. Touch her paws, ears, and face gently while she's standing. Introduce the sound of clippers running (without using them on her). This isn't wasted time, it's foundational safety work that prevents panic responses during actual grooming.
During grooming, use a grooming loop or non-slip mat to prevent sliding. A dog that feels secure doesn't fight restraint. Support the dog's weight with your non-dominant hand under the chest or hindquarters, depending on which area you're grooming. Never restrain by the neck or legs alone, this causes panic and increases injury risk. If your dog is anxious, take breaks. A 15-minute grooming session split into three 5-minute sessions is infinitely safer than one stressed 15-minute session.
Watch for stress signals: ears pinned back, whale eye (white showing around the iris), lip licking, yawning, or trembling. These aren't signs of a "difficult" dog, they're communication that your dog is overwhelmed. Stop grooming when you see these signals, let your dog rest, and resume only when she's calm.
First Aid for Dog Grooming Cuts and When to Seek Help
Minor cuts happen. The difference between a minor incident and a serious injury is how you respond. For small lacerations (less than 1/4 inch, minimal bleeding), clean the wound with cool water and mild soap. Apply direct pressure with a clean cloth for 2-3 minutes. Once bleeding stops, apply an antibiotic ointment (avoid products containing benzocaine or lidocaine, which can be toxic if ingested). Cover with a bandage if the location allows. Monitor for signs of infection: increased redness, swelling, discharge, or the dog licking excessively.
For deeper cuts, profuse bleeding, or lacerations on the face or eyes, contact your veterinarian immediately. Don't wait to see if it stops bleeding on its own. Eye injuries are particularly urgent, corneal scratches can lead to ulceration and vision loss if not treated promptly. According to veterinary research on grooming-related ocular injuries, 14% of ocular injury cases during grooming required surgical management, and delayed treatment worsened outcomes.
Abrasions (scrapes without deep cuts) should be cleaned and monitored but typically don't require veterinary attention unless they're extensive or show signs of infection. Burns from clippers or dryers are more serious. Mild burns appear as redness; moderate burns blister. Cool the area with lukewarm (not cold) water for 10 minutes, then contact your veterinarian. Never apply ice directly to a burn, it can cause additional tissue damage.
Breed-Specific Injury Risks and Prevention
Breed anatomy creates breed-specific injury vulnerabilities. Small-breed dogs, particularly Shih Tzus, face disproportionate risk of ocular injuries during grooming because their facial structure places eyes closer to the grooming area and their coat often covers their eyes, obscuring the groomer's view. When grooming a small-breed dog's face, part the coat away from the eyes, work slowly, and consider using a grooming loop that keeps the head stable and prevents sudden movement.
Brachycephalic breeds (bulldogs, pugs, Boston terriers) have compromised airways and overheat easily. Grooming generates stress and heat, which these breeds tolerate poorly. Limit grooming sessions to 15-20 minutes maximum, groom in a cool environment, and watch for signs of overheating: excessive panting, drooling, or lethargy. Stop immediately if you notice these signs. Never use a high-velocity dryer on a brachycephalic dog, the stress and heat combination is dangerous.
Dogs with long, dense coats (golden retrievers, German shepherds, huskies) are prone to matting, which restricts movement and creates pressure points. Matted areas can hide skin infections or parasites. Prevent matting through regular brushing (every 2-3 days) and deshedding. If matting is severe, professional grooming is safer than attempting to clip through heavy mats at home.
Senior dogs (over 7-8 years) have reduced tolerance for standing, heat, and stress. Shorter grooming sessions, more frequent breaks, and gentler handling are essential. Watch for signs of joint pain or fatigue, and stop if your dog shows discomfort.
Conclusion: Making Grooming Safe for Your Dog
Preventing grooming injuries in dogs requires understanding risk, investing in proper tools, and committing to technique. The 87% of groomers who experience dog-related injuries aren't careless, they're working in an inherently high-risk environment. At home, you control more variables, which means injury prevention is more achievable.
Frequently Asked Questions
What are the most common injuries that occur during dog grooming?
The most common grooming injuries include clipper burn, nail quick injuries, lacerations from scissors or clippers, and eye injuries from grooming products or tool contact. According to the International Grooming Society, 87% of groomers report being injured by dogs, and 62% experience equipment- or environment-related accidents like slips on wet floors or burns from dryers. Small-breed dogs like Shih Tzus face elevated risk of ocular injuries, with corneal ulceration accounting for 71% of eye injury cases during grooming.
How do I safely trim my dog's nails to avoid quicking?
To avoid hitting the nail quick, trim only the clear or white portion of the nail, stopping before the pink center becomes visible. Hold the nail clipper at a 45-degree angle and use a quick, decisive motion. If your dog has dark nails, trim small amounts and check the cross-section for a small dark dot in the center, stop before reaching it. Using a stainless steel nail clipper like the Dog & Cat Nail Clipper ($12.50) ensures clean cuts. Keep styptic powder on hand to stop bleeding if you do nick the quick, and consider desensitization training to help your dog stay calm during nail trims.
What should I do if my dog gets a minor cut while grooming?
For minor grooming cuts, stop the session immediately and clean the wound gently with lukewarm water. Apply styptic powder or a pet-safe antiseptic to control bleeding and prevent infection. If bleeding doesn't stop within 5-10 minutes, the cut may be deeper than it appears. Watch for signs of infection over the next few days, including redness, swelling, or discharge. Seek veterinary attention if the cut is deep, won't stop bleeding, shows signs of infection, or if your dog seems to be in significant pain. Always prioritize your dog's emotional comfort after an injury by offering reassurance and taking a break before resuming grooming.
How can I keep my dog calm and still during a grooming session?
Start with desensitization training weeks before grooming by letting your dog touch grooming tools, hear clipper sounds at low volume, and spend time on the grooming table without any actual grooming. Use positive reinforcement with treats and praise when your dog remains calm. During grooming, work in short sessions and take breaks when your dog shows stress signals like tension, pulling away, or excessive panting. A height-adjustable grooming table like the Mesa Grooming Luz ($170.75) helps you maintain proper ergonomics and keeps your dog at a comfortable working height. Keep the environment calm, avoid sudden movements, and consider using a slip-resistant mat to help your dog feel secure and stable.
Safe grooming starts with the right equipment and technique, but it's sustained through knowledge and attention. Pets R Smarter's curated selection of premium grooming tools, from height-adjustable tables to stainless steel clippers, prioritizes your dog's safety and comfort. Our Tail Satisfaction Guarantee ensures every tool you choose supports your grooming goals without risk to your pet. Explore our collection today and make grooming a stress-free experience your dog actually tolerates.
This article was written using GrandRanker