

Troubleshooting Dog Clipper Motor Issues: 2026 Guide
Table of Contents
- Diagnose the Problem: Power, Heat, or Sound
- Step-by-Step Fixes for Common Clipper Motor Issues
- Dog Clipper Overheating Causes and How to Prevent Them
- Essential Dog Clipper Maintenance Tips for a Longer Motor Life
- When to Replace Dog Clipper Carbon Brushes
- Advanced Diagnostics: Sound, Circuit Boards, and Internal Wiring
- Frequently Asked Questions
Last Updated: September 16, 2026
Diagnose the Problem: Power, Heat, or Sound
Most clipper failures that get blamed on the motor aren't motor failures at all. Diagnosis starts with one question: does the clipper respond at all when you flip the switch?
A clipper that stays completely silent points to a power or electrical contact problem. A clipper that runs but heats up fast points to friction, usually from a dry blade or a worn blade drive. A clipper that cuts out mid-groom points to the battery or charging port. Grouping symptoms this way saves you from replacing parts that were never broken.
Sound matters too. A healthy motor hums at a steady pitch. Grinding, rattling, or a pitch that drops under load all signal mechanical wear rather than electrical failure. Experienced groomers listen before they disassemble anything.
That's the diagnostic framework. Now the actual fixes.
Step-by-Step Fixes for Common Clipper Motor Issues
Work through these in order. Each step takes a few minutes and rules out one system before you move to the next.
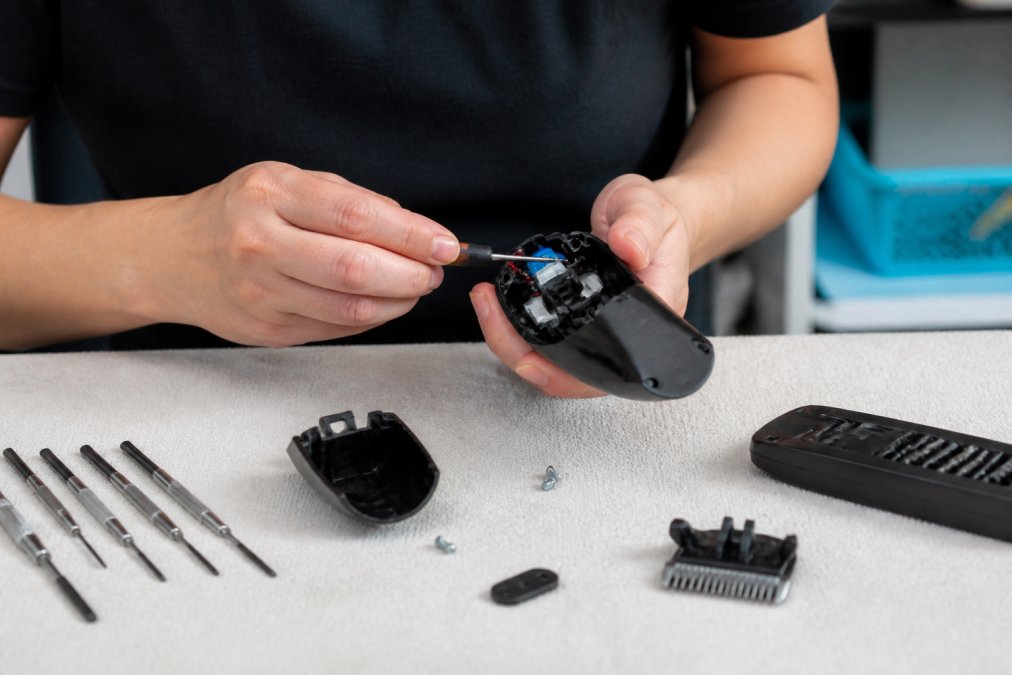
Clipper Won't Turn On: Check Power and Electrical Contacts
A clipper that won't start is usually a power delivery problem, not a dead motor. Start at the wall and work inward.
- Test the outlet with another device, then check the cord for kinks or fraying.
- For cordless models, charge fully and confirm the indicator light responds.
- Open the housing and inspect the electrical contacts and power switch for corrosion or looseness.
- Check electrical continuity across the switch with a multimeter.
If the switch and contacts test clean but the clipper still won't start, the fault likely sits deeper in the internal wiring.
Clipper Runs but Cuts Poorly: Clean and Replace the Blade Drive
A running clipper that snags or leaves uneven patches almost always has a blade problem, not a motor problem. Hair and debris accumulate between the blade drive and the clipper head, adding friction the motor has to fight through.
Remove the blade, brush out clogged hair, and check blade tension. If the blade drive is worn or cracked, replace it. A dull blade forces the motor to work harder, which accelerates wear on every moving part downstream.
Clipper Stops Mid-Groom: Battery and Charging Port Checks
A clipper that dies partway through a groom points to the cordless battery or the charging port. Clean the charging port with a dry brush, since debris there blocks contact and leaves the battery undercharged. If runtime keeps shrinking after a full charge, the battery has reached the end of its service life and needs replacement.
Dog Clipper Overheating Causes and How to Prevent Them
Overheating is the most misread symptom in clipper troubleshooting. The motor is usually the victim, not the cause.
The real culprits are friction and restricted airflow. A dry blade, a clogged blade drive, or packed hair around the housing all force the motor to draw more torque than it was designed for. That extra load converts directly into heat. The thermal cutoff then shuts the clipper down to protect the motor from burnout.
Prevention is straightforward. Oil the blade before every session. Clean debris from the housing after each use. Let the clipper cool between dogs rather than pushing through a third groom on a hot motor.
Essential Dog Clipper Maintenance Tips for a Longer Motor Life
Consistent maintenance is cheaper than any replacement part. These dog clipper maintenance tips take under five minutes a week.
- Oil the blade before every grooming session
- Brush hair out of the blade drive and clipper head after each use
- Check blade tension weekly and tighten if the blade rattles
- Clean the charging port monthly on cordless models
- Inspect the cord and power supply for wear every few months
- Replace the blade drive at the first sign of cracking or slippage
| Task | Frequency | Why It Matters |
|---|---|---|
| Oil the blade | Every session | Cuts friction and motor strain |
| Clear hair and debris | After each use | Prevents clogged hair and overheating |
| Check blade tension | Weekly | Stops rattling and uneven cuts |
| Clean charging port | Monthly | Maintains full battery charge |
| Inspect cord and power supply | Every few months | Catches electrical faults early |
A common mistake is treating maintenance as optional until something breaks. The clippers that last years are the ones that get oiled every single time.
When to Replace Dog Clipper Carbon Brushes
Carbon brushes are the wear item most owners never think about, and they are often the real answer to "my clipper motor is dying." A brush replacement costs a few dollars and an hour of your time; a motor replacement usually costs more than a new clipper.
What carbon brushes do and why they wear
Carbon brushes are spring-loaded blocks of graphite that press against the spinning commutator on the motor's armature. They carry electrical current from the stationary wiring into the rotating armature. Every hour the motor runs, the brushes sacrifice a thin layer of carbon to keep that contact clean. Over hundreds of hours, they shorten until the spring can no longer keep them pressed against the commutator.
When contact weakens, three things happen at once: current flow becomes erratic, the commutator arcs, and the motor loses torque.
Sound and spark signatures
Brush wear has a distinct signature that separates it from blade-drive or bearing failure:
- High-pitched whine that rises with speed, plus visible sparking through the housing vents, classic brush wear. Sparks should be small and blue at the brush contact; bright orange or yellow arcing means the brushes are too short or the commutator is dirty.
- Erratic speed that surges and drops without load changes, intermittent brush contact. The motor is losing and regaining current many times per second.
- Burning smell with no visible heat on the blade, arcing at the brush-commutator interface, not friction downstream.
- Motor stalls under light load but runs free, brushes are at end of life and cannot deliver enough current to hold torque.
Replacement steps and tool-specific notes
- Unplug the clipper or remove the battery before opening the housing. Brushes sit on live contacts even when the switch is off.
- Locate the brush caps, usually two small plastic or metal caps on opposite sides of the motor housing. Some models use a flathead slot; others need a small Phillips or a coin.
- Unscrew the caps slowly. The brush and its spring will pop out under tension. Cup your hand over the cap so the spring does not launch across the room.
- Note the orientation of the brush before removing it. Most brushes are keyed and only seat one way.
- Wipe the commutator with a soft cloth or a pencil eraser to remove carbon dust. Do not use sandpaper; it removes copper and shortens commutator life.
- Install matching replacement brushes. Brush size is model-specific, check the parts diagram for the exact part number rather than buying a generic assortment.
- Seat the brushes by running the clipper unloaded for two to three minutes. You may see light sparking during this break-in period; it should fade as the brush face conforms to the commutator.
When brushes are not the answer
If new brushes spark heavily right away, the commutator is likely worn or scored and the motor is at end of life. If the motor still loses torque after a proper brush replacement and break-in, the fault is in the armature windings or the circuit board, not the brushes. At that point, compare the cost of a motor or board replacement against a new clipper, for most consumer models, replacement wins.
Advanced Diagnostics: Sound, Circuit Boards, and Internal Wiring
Sound-based diagnostics separate a mechanical failure from an electrical one faster than any disassembly.
Frequently Asked Questions
What are the most common reasons a dog clipper motor stops working?
The most frequent causes are clogged hair and debris, dull or misaligned blades, worn carbon brushes, and battery or charging issues. Internal wiring or a faulty circuit board can also cut power. Start by cleaning the blade and checking the power source; if those are fine, inspect the brushes and electrical contacts. Regular maintenance prevents many of these clipper motor issues.
How can I tell if my dog clipper motor is burnt out?
Signs include a burning smell, excessive heat, or no response even when powered. A burnt-out motor often results from overheating due to lack of lubrication or from running with clogged blades. If the motor hums but doesn't turn, it may be seized. Test with a multimeter for continuity; if there's no reading, the motor likely needs replacement.
Are there simple maintenance steps to prevent dog clipper motor failure?
Yes. Oil the blades before each use, clean hair from the blade drive and housing after every groom, and check carbon brushes every few months. Avoid dropping the clipper and store it in a dry place. Following dog clipper maintenance tips like these reduces friction and motor strain, extending the life of your clipper.
When should I repair my dog clippers versus replacing them?
If the issue is a worn blade, carbon brushes, or a clogged fan, repair is usually cost-effective. But if the motor is burnt out or the circuit board is damaged, replacement may be better. Consider the clipper's age and replacement part availability. For premium clippers, a $10 brush replacement is worth trying before buying new.